


 English
 عربى
عربىNews

Straw Plastic Water Bottle Hygiene and Cleaning Tips
That faint smell coming from your water bottle after a workout is not imaginary, and it does not go away with a quick rinse. The straw, the lid, the silicone seals — each part traps moisture and residue in ways a regular cup never does. If you use a Straw Plastic Water Bottle for sports, gym sessions, or daily hydration, the internal structure creates more surface area for bacteria and mold to settle in, especially along the inner walls of the straw itself. Knowing exactly how to clean each component — and how often — is what separates a bottle that stays fresh for years from one that develops persistent odor and hygiene issues within weeks.
Why Straw Bottles Are Harder to Clean Than Regular Bottles
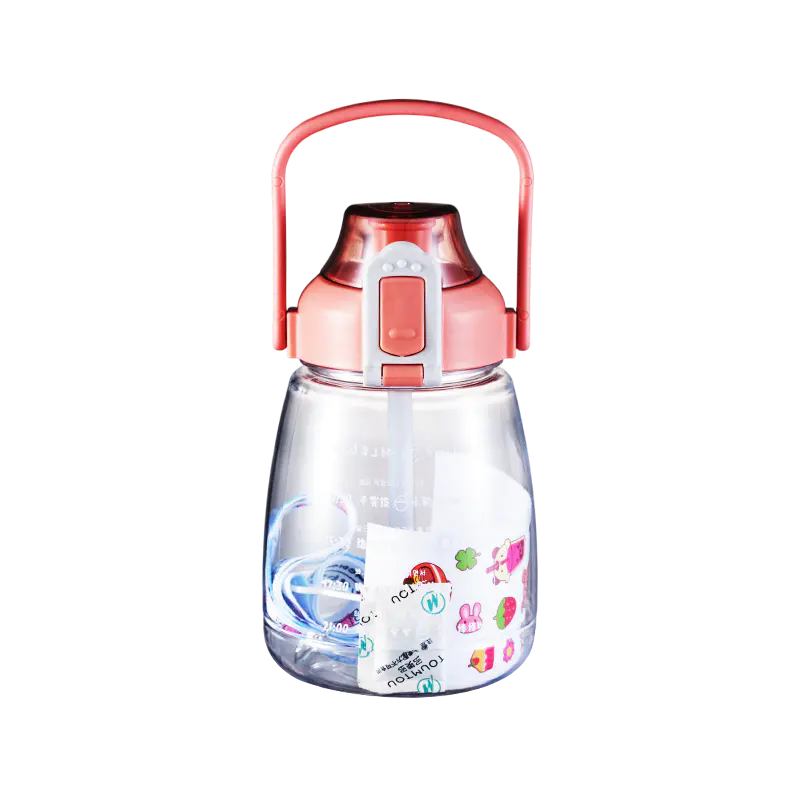
The design that makes straw bottles convenient also makes them more demanding to clean.
Key reasons why hygiene issues develop faster:
- The straw interior is narrow, dark, and frequently wet — conditions that encourage bacterial growth and mold formation
- Moisture gets trapped at the base of the straw where it connects to the lid, a spot most rinses never reach
- Silicone seals and gaskets around the lid and mouthpiece collect residue along their edges
- Sports drinks, flavored water, and protein shakes leave sugar and protein residue that plain water cannot remove
- The lid assembly often has multiple small parts with gaps that trap liquid between washes
A simple rinse after each use is not enough for any of these areas. The straw, in particular, needs dedicated cleaning with a brush sized for its interior diameter.
What You Need Before You Start Cleaning
Having the right tools makes thorough cleaning possible and protects the plastic from damage in the process.
Cleaning tools to have on hand:
- A narrow straw cleaning brush — long enough to pass through the full length of the straw and flexible enough to reach curves
- A bottle brush sized for the interior of the main vessel
- A small detail brush or old soft toothbrush for silicone seals and lid crevices
- Dish soap — mild, unscented versions are less likely to leave a soapy aftertaste in the plastic
- White vinegar and baking soda for deep cleaning and odor removal
- A drying rack or clean towel for air drying all components separately
Avoid steel wool, abrasive scrubbers, or harsh solvents. These scratch the interior surface of the plastic, and scratches create additional places for bacteria to accumulate over time.
How to Disassemble the Bottle Before Cleaning
Cleaning a straw bottle properly requires taking it apart completely. Running water through an assembled bottle without removing the parts leaves most of the hygiene-critical surfaces untouched.
Disassembly steps:
- Remove the straw from the lid — most straws pull straight out or twist and release
- Unscrew or unclip the lid from the bottle body
- Remove any silicone gaskets or seals from the lid; these typically peel out of a groove or channel
- Detach the mouthpiece or bite valve if it is a separate removable component
- Lay all parts on a clean surface before washing so nothing gets missed
Taking the extra minute to fully disassemble makes the cleaning process faster and more effective because every surface becomes directly accessible.
Step-by-Step Daily Cleaning Routine
Daily cleaning does not need to be lengthy. Done consistently, it prevents the buildup that makes deep cleaning necessary more often.
Daily wash process:
- Rinse all parts immediately after use — do not let liquid sit in the bottle or straw
- Fill the bottle body with warm water and a small amount of dish soap, close with your hand, and shake to coat the interior
- Use the bottle brush to scrub the interior walls, paying attention to the bottom and any indentations
- Run the straw brush through the straw twice in each direction, covering the full length
- Scrub the lid interior and the mouthpiece with the detail brush; work the bristles into any grooves or seams
- Remove and scrub silicone gaskets separately — soap and a finger or soft brush removes residue from the sealing surfaces
- Rinse all parts thoroughly under running water until no soap residue remains
- Place all components separately on a drying rack and allow them to air dry completely before reassembling
The air drying step is not optional. Reassembling a bottle while any part is still damp creates exactly the enclosed moisture environment that promotes mold growth.
Is a Dishwasher Safe for Cleaning a Straw Bottle?
Many plastic straw bottles are labeled dishwasher safe, but the practical answer is more nuanced than the label suggests.
What dishwasher use does well:
- Sanitizes the main bottle body effectively with hot water and detergent
- Handles the lid if placed on the top rack away from the heating element
What dishwasher use does poorly:
- The straw rarely gets cleaned inside during a dishwasher cycle — water pressure does not penetrate the narrow interior consistently
- Silicone seals can degrade faster when exposed repeatedly to high-heat cycles
- Small components sometimes move around in the dishwasher basket and do not get fully exposed to the cleaning water
A practical approach for regular users: wash the straw and silicone seals by hand every time, and use the dishwasher for the bottle body and lid on days when a full hand wash is not practical. Never rely on the dishwasher alone for a bottle that is used daily with anything other than plain water.
How to Deep Clean and Remove Stubborn Odors
When daily washing is not enough — after extended use, after a bottle has been stored while still damp, or when an odor has developed that regular soap does not remove — a deeper cleaning approach is needed.
Baking Soda Method
Baking soda neutralizes acidic odors and helps lift residue from plastic surfaces.
Steps:
- Add a tablespoon of baking soda to the bottle and fill it halfway with warm water
- Insert the straw and place the lid on loosely; shake the bottle to coat all interior surfaces
- Pass the straw brush through the straw several times while the solution is inside
- Let the solution sit for several hours or overnight
- Rinse thoroughly and repeat the straw brush process with clean water
White Vinegar Method
Vinegar is effective against both odor and mold, and it does not leave a harmful residue when rinsed properly.
Steps:
- Mix equal parts white vinegar and water
- Fill the bottle with the solution and submerge the straw and lid in a separate bowl of the same mixture
- Allow everything to soak for at least thirty minutes — longer for stronger odors
- Scrub all parts as you would in the daily routine before rinsing
- Rinse several times with clean water; any faint vinegar smell disappears once the bottle dries completely
Combined Method for Persistent Buildup
For bottles that have developed visible residue or a smell that neither method alone has resolved:
- Use the baking soda soak overnight
- Follow with a white vinegar rinse the next morning
- Scrub all parts thoroughly before the final rinse and dry
Avoid mixing baking soda and vinegar directly in the bottle — the reaction creates foam without additional cleaning benefit and is harder to rinse out completely.
Cleaning the Straw: The Part Most People Get Wrong
The straw is where hygiene failures concentrate, and it is the component that requires the most specific attention.
Common mistakes when cleaning straws:
- Running water through the straw without using a brush — this rinses the center but does not contact the walls
- Using a brush that is too thick, which scrapes and deforms the straw interior
- Using a brush that is too thin, which passes through without applying enough pressure to remove residue
- Skipping the straw during deep cleaning because it takes extra effort
Correct straw cleaning technique:
- Wet the straw brush and apply a small amount of soap to the bristles
- Insert the brush into one end of the straw and push it through in a twisting motion to the other end
- Pull the brush back with the same twisting motion
- Repeat at least twice in each direction
- Rinse the straw under running water while passing the brush through once more
- Stand the straw upright to drain and dry
For extra hygiene, soak the straw in the vinegar solution described above once a week if the bottle is used daily.
A Comparison of Cleaning Methods
| Method | What It Addresses | Frequency | Effort Level | Notes |
|---|---|---|---|---|
| Warm soapy water with brushes | Daily residue, light bacteria | After every use | Low | Non-negotiable baseline |
| Dishwasher (bottle body only) | General sanitization | When convenient | Very low | Does not replace straw hand cleaning |
| Baking soda soak | Odor, mild buildup | Weekly or as needed | Low | Effective on acidic odors |
| White vinegar soak | Odor, mold, mineral deposits | Weekly or as needed | Low | Rinse thoroughly after use |
| Combined baking soda and vinegar | Stubborn odor and residue | Monthly or when needed | Moderate | Thorough non-chemical option |
Building a cleaning schedule around these rows — daily soap wash, weekly vinegar soak, and a combined treatment monthly — keeps a plastic straw bottle clean through regular use without requiring excessive time or effort.
How Often Should Deep Cleaning Happen?
Cleaning frequency depends on what goes into the bottle and how consistently the daily routine is followed.
Practical frequency guidelines:
- Plain water only: Daily soap wash is sufficient; deep clean once a week
- Sports drinks or flavored beverages: Deep clean every three to four days; sugar and flavoring accelerate residue buildup
- Protein shakes or meal replacement drinks: Deep clean after every use; protein residue builds up quickly and is harder to remove once it dries
- After any period of storage: Deep clean before using a bottle that has been stored for more than a few days, even if it appeared clean when put away
Any visible discoloration, persistent smell after cleaning, or visible mold in the straw or at the lid seals is a signal that the cleaning routine needs to be more frequent or more thorough.
Signs That Parts Need to Be Replaced
Cleaning extends a bottle's useful life, but certain components wear out regardless of how well they are maintained.
Replace the straw when:
- The interior walls show visible discoloration that does not respond to deep cleaning
- The plastic feels tacky or has developed surface texture changes
- The straw has visible cracks, chips, or deformation
Replace silicone seals and gaskets when:
- The seal no longer sits flush in its groove
- Visible mold has formed in the silicone material itself and does not scrub out
- The seal has hardened, cracked, or lost its flexibility
Replace the full bottle when:
- The interior plastic surface has significant scratching that traps residue despite cleaning
- Persistent odor remains after repeated deep cleaning cycles
- Any structural component — particularly the lid mechanism — no longer seals correctly
Replacing worn components rather than continuing to use a compromised bottle is the practical side of long-term hygiene management.
Daily Habits That Prevent Problems Before They Start
The most effective cleaning approach is one that reduces the need for intensive cleaning in the first place.
Habits worth building:
- Rinse the bottle and straw immediately after finishing a drink — do not leave liquid sitting inside, even for a short time
- Store the bottle with the lid off or loosely placed so the interior can breathe between uses
- Never store the bottle while any component is still wet
- Avoid leaving flavored drinks or protein shakes in the bottle for extended periods
- Keep a straw brush with the bottle as a reminder that the straw needs cleaning every time
Small consistent habits compound over time. A bottle that is rinsed immediately and dried thoroughly after each use develops far fewer hygiene issues than one that sits closed with residue inside for hours before the next wash.
Keeping a straw water bottle genuinely clean is not complicated, but it does require treating the straw, seals, and lid as separate components rather than parts that a general rinse will reach. The daily routine with warm soapy water and a straw brush, combined with weekly deep cleaning and complete air drying, is what maintains a hygienic bottle through regular sports or fitness use. For distributors, retailers, and procurement teams sourcing reusable sports bottles, the construction quality of a plastic straw bottle directly affects how cleanable it is in practice — bottles with fully removable straws, detachable silicone gaskets, and smooth interior surfaces are significantly easier to maintain than those with fixed components or complex assemblies. Taizhou Huangyan Zuohao Plastic Factory produces straw plastic water bottles with practical cleaning considerations built into the design, including removable components and material selections suited to both daily washing and deep cleaning routines. Reaching out to their team with your product specifications or volume requirements is a straightforward way to explore options that meet both the functional and hygiene standards your customers expect.
Related Products
We specialize in the production and sales of plastic water cups, and also provide customization services
and comprehensive after-sales support.
QUICK LINKS
CONTACT US
- Address:No. 1 Shuangyou Road, Nancheng Street, Huangyan District, Taishan City, Zhejiang Province
- Tel: +86-19957687783
- Email: [email protected]
- Whatsapp: +86-19957687783
MOBILE
Copyright © Taizhou Huangyan Zuohao Plastic Factory.
All Rights Reserved.
